Dockerfile to build your image. If we detect a Dockerfile in your project directory, we’ll use that instead of Nixpacks.
Deployment Methods
There are various ways to deploy applications to Hop.Deploy from GitHub
Deploy from GitHub
GitHub
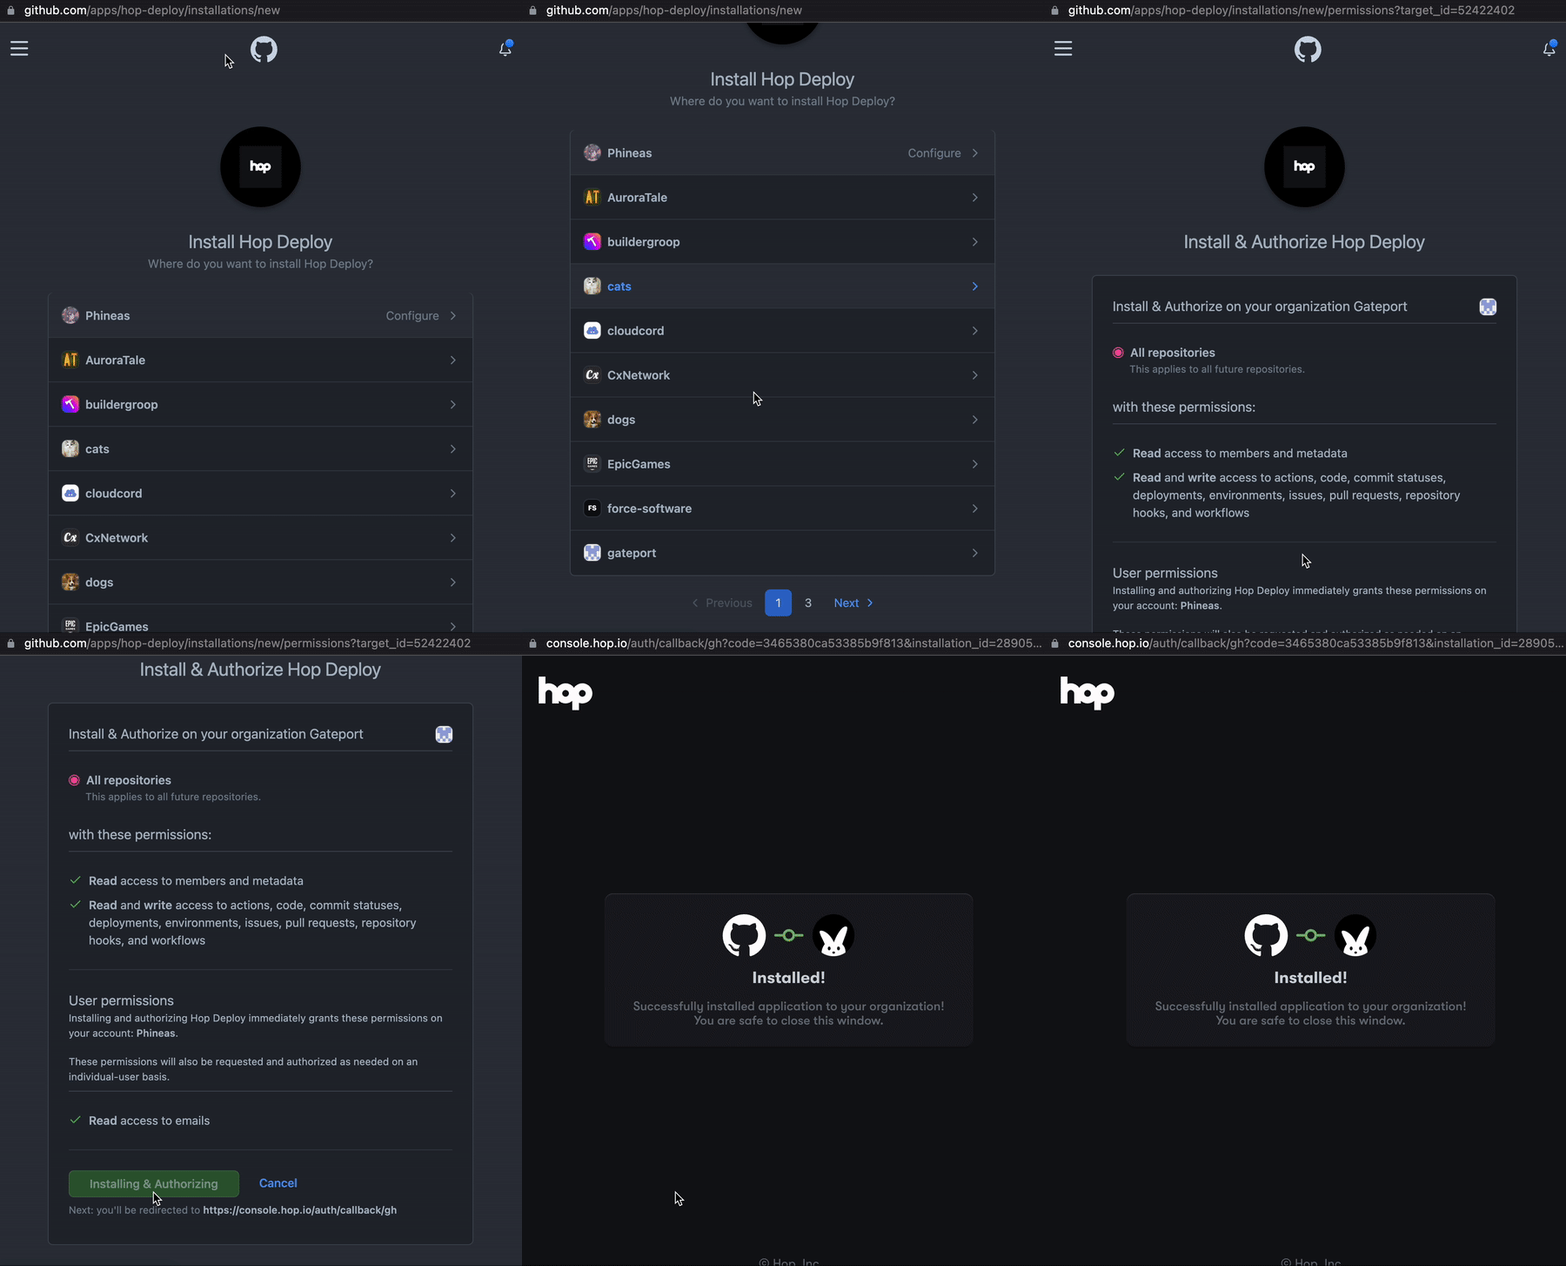
Deploying to Hop from GitHub allows you to easily connect a GitHub repository to Ignite and have your project be automatically deployed when you push to your main branch.Creating the Deployment
Select “Create Deployment” under the Ignite page, or, alternatively use the Cmd+K menu and search GitHub.Linking GitHub Account
You will now be prompted to link your GitHub account to Hop. Once connected, you can give Hop permission to all or individual repositories on your account.
Pushing Updates to your Deployment
To push an update to a GitHub deployment, simplygit push to the main branch.Hop will automatically detect this push and will begin building the new release.
Once built, Hop will create a rollout: create containers for the new build and
delete the old ones once the new ones are running.Deploy a project using the Hop CLI
Deploy a project using the Hop CLI
Hop CLI
The easiest way to deploy a project directory is to use the Hop CLI.Installation
Follow the install guide to install the CLI on your machine.Deploying
Once installed and logged into the CLI, you can navigate to your project directory in your terminal and usehop deploy.Pushing Updates
If you need to deploy an update, just runhop deploy again and it’ll take care
of the rest, including smoothly rolling out new containers to guarantee uptime.Rolling Back
If you accidentally pushed out a bad update, you can use the following command to roll back to the previous deployment.Linking a Project Directory to an Existing Deployment
If you’ve already created a deployment on Hop and want to link a project directory to that deployment, you can use:Deployment Options
When creating a deployment, you are able to configure various options to customize how your application runs. All of these options can be updated after the deployment is created, too.Resources
The resources section allows you to configure the compute resources your that each container which runs within your deployment will be allocated (vCPU, memory and disk space). Hop has 4 presets which you can choose from to quickly set your resources. You can also configure the resources manually by selecting Custom Resources and setting the values yourself.Volume Settings
If you select the Add volume to deployment checkbox, you’re able to configure the size and mount path of the volume that will be attached to your deployment. Please note that by selecting this option, your deployment will become Stateful. Stateful deployments may currently only run one container at a time.File system
You can choose between two file systems for your volume:ext4 and xfs. In general, XFS is better at handling large files, while Ext4 is more is more performant when handling a lot of small files. XFS is usually recommended for running databases. Please see this article by Red Hat for more information.
Environment Variables
You can add environment variables through our GUI, plain text editor and JSON editor. Once set, your environment variables will be made available to your application during build time and runtime. You can also point environment variables to project secrets. If using the GUI, you can select a secret from the dropdown. If using a text editor, API or CLI, you can use the following syntax:Advanced Options
You should only modify these options if you understand how the Dockerfile is built for the image you’re trying to deploy.Ephemeral containers
You cannot use Ephemeral containers with Stateful deployments (volumes).